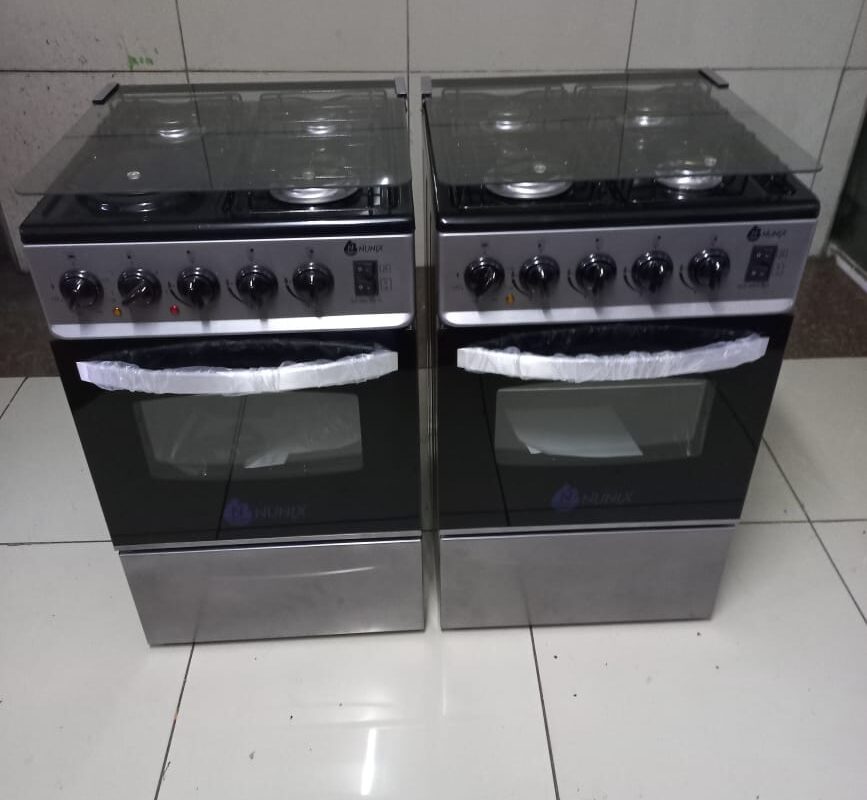
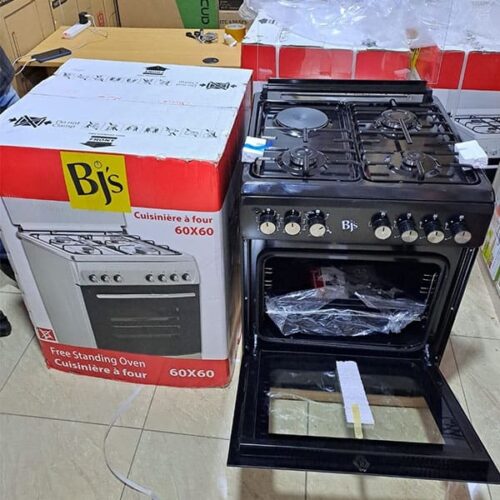
kiambu appliances repare is a reputed home appliance repair agency located in nairobi, kenya. Our experienced repair agents in offering efficient repair services for all brands of gas cookers, microwave ovens, water heaters, induction stoves and other small kitchen appliances.Kindly reach us to book our prompt and affordable home appliance repair services.
cooker maintainance in nairobi
Log in to .our repairs operates a 24-hour appliance repair and spare part service in nairobi to get your appliance up and running as quickly as possible. we could save you money by extending the life of your cooker or oven and improving its performance. all our engineers our gas safe registered and offer: fast fit repairs
Cooker Repair along Thika Road
0716521427 Top Oven & Cooker Repair Experts in nairobi kitengela
Are you facing a problem with your gas line or gas cooker?. at first check if your gas cooker is not working due to a fault. ., then fine you will need a repair certainly with a expert of gas cooker repairs. there may be several more reasons your gas cooker is faulty. however in such situatiation we offer you complete trouble shoot and gas stove repair nairobi. we also offer oven repair nairobi, microwave repair nairobi and cooking range repair nairobi
0716521427 gas cooker washing machine repair in kitengela freelancing services
Arranging your cooker & oven repair in your local area couldn’t be easier. Our appliance engineers are fully trained and our fixed price cooker & oven repairs include calling immediately.
0716521427 Oven Parts Repair & Spares in nairobi
Oven Parts Repair & Spares
Get your oven parts and spare installation, repair and service in Nairobi Kenya with ease. Understanding the different parts of an oven is a first important step towards understanding their use and importance
Your oven can be a complicated appliance, one that most of us use every day but know little about. If your oven becomes faulty it can be difficult to pin point the part of the oven that is causing the issue. So firstly, it’s important to know the key components of your oven. The parts of your oven that may cause problems are oven elements, thermometers and the fan or motor.
You may think there is no way you’re capable of working out why your oven isn’t working or being able to fix it – but it really isn’t as complicated as you think. Here are Cooker Spare Parts we are here to help, so here is a little run down of the important parts of your cooker. We’ll inform you of their role in your cooker, what will happen if it becomes faulty and how you can fix the problem. So let’s get down to it.
Oven Elements
We start with possibly one of the most important parts of your cooker, the oven element! It’s the cooker part that heats up and supplies the heat that will cook your meals. There are two types of oven elements – Fan Oven Elements and Oven Base Elements. A fan oven element is circular in shape and is fitted in front of your oven fan – this will allow the heat to be evenly spread around your oven cavity. An Oven Base Element fits to the bottom of your oven and distributes heat from there – however the hot air isn’t as evenly spread as a fan oven element.
If your oven element is faulty, you may find that your oven is struggling to heat up or isn’t heating up at all. This of course is a bit of a problem, as your cooker’s main role is to produce heat that will enable you to cook your meals. If you’re oven element is faulty, we recommend that you take a look at our fantastic selection of replacement oven elements. We’re confident they’ll have your oven performing better than ever before!
Electric Thermostats and Regulators
Every electric cooker needs a thermostat! Without a fully working thermostat your oven’s temperature won’t be properly regulated. Your oven’s thermostat is in charge of informing your oven element to stop heating up once it has reached the temperature you set it to. It also ensures that your oven remains at that temperature. If your oven thermostat or regulators are faulty, you may find that your oven will be overheating or even under heating – causing your food to be incorrectly cooked, and therefore should be replaced as soon as possible.
Here at Cooker Spare Parts we have a huge range of Electric Thermostats and Regulators that will ensure your cooker’s temperature is regulated once again.
Oven Fan and Motors
We sell two types oven fans here at Cooker Spare Parts. The first oven fan we sell is responsible for evenly distributing the hot air in your oven cavity. It is situated behind your fan oven element at the back of your oven cavity. The other oven fan we have to offer is a cooling fan; and you can probably guess its role – your oven cooling fan’s job is to prevent your oven from overheating and burning your meals. Both these oven fans are very important components to your cooker, and if they’re faulty it’s very important to replace them as soon as you can.
0716521427 Oven Maintenance in Nairobi
Oven Maintenance in Nairobi
We Call us to do general Oven Maintenance for you in Nairobi Kenya.This will enable the appliance serve you better and last longer. Here are some tips on the whole process of Oven Maintenance
Oven Maintenance Tips
How often do you use your oven? How often do you look inside to inspect just how clean it is? And, well, how often do you clean it? Have you tested the temperature lately to ensure it is heating properly?
Somewhere along the line, whether you realize it or not, there is a good chance you have spilled food inside your oven. It could have boiled over the top of your casserole dish or splattered as something began to heat up. Did you clean it up? Unlikely. Most often, when the food is done, we pull it out, feast on our deliciousness, and move on. Right?
This means that the next time you go to bake something in your oven, you are going to get those drippings and splatters nice and crispy. And, probably add more to them. Then the next time, you do it again. Over and over.
Before long, your oven is not going to look too clean – and attempting to clean it is going to be quite the chore.
Just like a car requires routine maintenance to ensure it runs at its optimal level, so does your oven.
Here are a few oven maintenance to help you keep your range in top condition.
Make Use of Your Oven’s Self-Cleaning Feature
Most ovens have these, but very few people are familiar with how it works. Read your manual or contact the manufacturer. Be sure to wipe down the inside of the oven after it cools down. And, whatever you do, never start the self-cleaning feature and leave home.
Clean Your Oven Regularly
Experts say that you should give your oven a thorough cleaning at least twice each year. Of course, if you use it daily, you may want to increase that cleaning routine to, say, every couple of months. Leaving burnt food to continue to re-burn with every use will eventually cause your oven to work less efficiently. Not to mention that the continuous smell of burnt food every time you use it will eventually start affecting the taste of your new meal.
Don’t Remove Your Oven’s Knobs
These knobs are directly connected to your oven’s control system. When you remove them to spray cleaner on them, you are actually putting yourself at risk of electrocution. As tempting as it is to clean them this way, don’t. Leave your knobs right where they are.
Inspect and Replace Your Gas Line
Every time you purchase a new oven, you should always update your gas line, too. It seems like a logical thing to do, right? After all, a fresh line means less chance of a leak down the road. But, here’s the thing – what if you have invested in a well-working oven and you don’t plan on upgrading anytime soon? If you have had your oven for a while, you may want to take the time to inspect the line. If it looks at all worn, replace it.
Always Unplug Your Oven When You Clean
Now, we aren’t necessarily referring to when you decide to wipe down the stovetop. Or even clean your oven’s glass window. But, because this is an electrical appliance that is not made for dealing with water or lots of liquid cleaners, by leaving it plugged in you are putting yourself at risk for electrocution.
Check Your Element (Burners) Regularly
If you see any debris on it, any deformities, or a spot that glows a little bit brighter than the rest, you are going to want to replace it. It can spark and create a flame as it shorts out. Generally, it’s a rather minor issue. However, it can result in heavy damage to the appliance. As soon as you notice this, stop using your oven and replace the burner/element.
Take Care When Baking
If you are baking a full casserole or pie, for example, consider putting a larger baking sheet underneath it. This will catch anything that may leak out or boil over, reducing the mess within your oven.
If you do notice spills, though, when you are done baking, you should always wipe down the inside of the oven as soon as it cools. This reduces a bigger mess later.
Don’t Forget to Clean Your Racks
It is easy to focus on the bottom and sides of your oven. And, for good reason – that is usually where all the food is. But, it is not the only place. In order to reach the bottom, it has to go through the racks. So, be sure to give them as much attention as the rest of the oven when cleaning.
Inspect Your Door Gaskets
This is the rubber piece that runs along the oven door that helps seal in the heat. Over time, this gasket can begin to deteriorate, allowing heat to seep through, and resulting in your oven not heating appropriately.
Make a point to regularly inspect your oven’s gasket and replace it if necessary so that your oven may operate efficiently.
Slide Your Oven Out and Clean Underneath and Behind It
Your oven requires a bit of space to allow air to flow around it. While it was likely installed this way, over time that could change. Crumbs, debris, and all sorts of things can find their way underneath the oven, on either side and behind it. This can disrupt the flow of air and, in some instances, create a fire hazard.
0716521427 Microwave Oven Maintenance in nairobi kitengela
WW2Microwave Oven Maintenance
The best Microwave Oven Maintenane services in Nairobi can be acquired from TopFix Appliances. We will conduct great maintenance for your oven to get it to work longer and more efficiencly
Preventative Maintenance for Your Microwave Oven
Microwave ovens are cheaper and easier to replace than the larger appliances in your kitchen, so many people don’t worry about preventative care. However, by following a few easy steps, you can keep your microwave sparkling clean and in better condition so you don’t have to replace it for a long time.
- Keep the inside clean. By regularly wiping out the inside of your microwave, you cut down on bad smells and keep spots and corrosion from developing. Food and liquid left in the oven will continue to cook each time it’s used and will absorb the energy meant to heat up your current meal, making it less efficient. Clean any spills and splatters right away, and do a full wipe-down with a mild detergent once a week to once a month, depending on your usage.
- Keep the outside clean. Dust, grease, and other residues can build up on the outside of your microwave, especially on the controls. Old stains are harder to clean than new messes, so keep your microwave looking brand new by wiping it down regularly. This includes the areas around the microwave such as the countertop or cabinet.
- Use microwaveable containers. Non-microwaveable plastic containers can melt and even leave toxic particles in your food. Make sure you use containers that are specifically labeled as microwave-safe. These are often made of ceramic, glass, or tougher plastic.
- Cover your food. Use a microwave-safe plastic cover over your dishes or use the lids on your microwave-safe food containers. Splashes happen during the microwaving process as the liquid heats up, and preventing them from hitting the walls of the microwave makes cleanup easier and protects the paint and metal of the oven.
- Never put metal in your microwave. The microwaves emitted from the oven bounce off of metallic materials, so metal in the oven will cause the interior to heat up unevenly and can cause damage. This includes aluminum.
- Make sure the door closes properly. If the door is damaged or the seal is cracked, food won’t cook evenly and radiation can escape.
Preventative maintenance on your microwave oven can increase its lifespan significantly. It will also help keep your kitchen looking and smelling fresh.
0716521427 Microwave Oven parts & Spares in nairobi
Microwave Oven parts & Spares
We will source and replace parts of your microwave oven that are broken or not working, and we can also fix / repair parts that are fixable in the event of failure
What Are the Parts of a Microwave? A Summary
There are several parts of a microwave, and they each have a specific role in heating your food. They consist of internal components that help cook the food and external pieces that prevent radiation from escaping. In a nutshell, these include:
Internal parts: Magnetrons, high-voltage transformer, waveguide, cooling fan, turntable, and cooking cavity.
External components: Case, power cord, door, and control panel.
Parts of a Microwave Explained
Diagram showing the various parts of a microwave in a cutaway image
Zern Liew/Shutterstock
The parts of a microwave are similar in all units but may vary to a degree. Each component performs a particular function to deliver thoroughly cooked meals safely and efficiently. First, we’ll start with the internal components, which cook the food and work our way to the external parts.
1. Magnetrons
The microwave’s magnetron consists of a vacuum-like tube and a strong magnet and sits on the same side as the control panel.
Like a human brain sends messages to the body, magnetrons produce microwaves that travel through the waveguide and bounce from the oven’s metal interior to the water molecules in the food.
The tiny waves cause the water molecules to vibrate. The friction of the vibrating molecules produces heat, thereby cooking the food.
2. High-Voltage Transformer
Most microwaves require at least 3000-4000 volts to heat food. Standard outlets use about 115 volts of power. The high-voltage transformer converts that lower voltage into higher energy to cook food. As with any part, the size and power level will vary depending on the type of microwave you have.
3. Waveguide
The waveguide is a hollow metal tube that extends from the magnetron to the cooling fan. It directs the flow of microwaves from the magnetron to the cooking chamber.
While these waves transfer, they reflect off the inner walls and into the food, cooking it. A waveguide includes a thin plastic or cardboard-like cover to protect the internal components from food and splatters during cooking.
It sits on the same side as the control panel. What happens if the protective layer comes off? Your microwave could suffer damage to the circuit boards, causing it to quit working.
4. Cooling Fan
The cooling fan, or stirrer in older versions, is a part of the microwave ceiling, with a covering to protect it against splatters. The fan prevents the unit from overheating. If too many heatwaves build up, not only will the food possibly burn.
But the appliance may become too hot (more than 150 degrees) and break down. When the microwave has been in use for a long time, it gets hot inside the chamber. The cooling fan knows when to turn on and off.
It automatically kicks on and begins to cool your appliance. If you notice it’s still running after you complete your heating cycle, don’t panic. It’s normal for it to stay on as long as necessary to cool the unit.
5. Cooking Cavity
The cooking cavity is the deep inner compartment that holds the food while it cooks. The inner walls consist of thick, stainless steel to absorb the waves when they leave the food.
In this cavity is where the turntable sits. The compartment keeps the inner air at room temperature so that your food doesn’t overcook.
6. Turntable
You place your food on a round glass or plastic plate so that the food will rotate during cooking. The purpose of rotating your food is that heat will evenly distribute through and cook it thoroughly.
All microwaves are different, but most turntables attach to an interlocking mechanism that rotates. Turntables are easy to remove and wash.
7. Exterior Case
The outer case is the outer metal shell of the microwave that houses the inner components and cooking chamber. Waves stay inside the cavity when the sealed door creates a seal to protect you from radiation during the cooking cycle.
8. Door
The door consists of a window to let you view your food. Some microwaves have a light that comes on during heating so that you can see clearer. A metal mesh lining between the glass layers prevents minute waves from leaking out.
This allows you to see in but keeps radiation away. The rubber seal around the door blocks radiation from leaking out. To ensure safety, the seal must be in good working condition. The presence of cracks could indicate wear and tear.
9. Control Panel
Microwaves come with a control panel that allows you to choose your settings. Use a knob or buttons to determine the cooking time, cooking power, or mode, depending on what model you have. Most appliances include a defrost setting, a timer, and a clock.
Some units may include an option to pre-set cooking times. All microwave control panels have a door release button. You may have extra selections for potato, popcorn, or other types of food.
10. Power Cord
This component speaks for itself. It connects the microwave to electricity. You can detach the power cord from the back of the unit if you need to replace it.
Things to Consider
Capacitor, another important microwave part, sitting on a counter
Although microwaves provide a low risk of radiation exposure, it is advisable to use them with caution.
If you have a unit that is old and has broken parts, don’t try to use it. The possibility of electromagnetic radiation is higher when using a defective device. Inspect your oven for problem areas.
One crucial safety step to take is to avoid standing directly in front of the appliance when it’s cooking. In case your oven is defective, you don’t want to risk exposure to radiation by being too close.
Another smart move is to read the instruction manual before you begin the operation of the device. Each model of microwave may have safety features unique to its design. Proper use will reduce the risk of injury.
Be sure to use microwave-safe containers because they don’t absorb as many radioactive waves as your food. The dishes won’t get as hot as your food.
0716521427 freelance washing machine technician experts in Nairobi
Washing Machine Repair in Nairobi
WASHING MACHINE
How to Fix a Washing Machine: Common Washing machine Faults & Problems
Common washing machine problems can range using too much detergent, to water covering your floor. Some are easy fixes and others may require hiring a professional to diagnose and do the repairs. However, in most cases, with a little bit of troubleshooting you’ll be able to at least have a good idea where the problem originated. There’s never a good time for your clothes washer to act up, but taking action sooner vs. later can help keep a small problem from developing into something far greater. We’ve compiled a list of the most common washer problems to help you troubleshoot and plan your next step of resolving your situation.
Common Washer Problems
- Washing Machine Won’t Turn On
- Washing Machine Not Draining Properly
- Washing Machine Will Not Spin and/or Agitate
- Washing Machine Leaking Water
- Washing Machine Does Not Dispense Detergent
- Washing Machine is Shaking and Moving
- Washing Machine is Noisy
- Washing Machine Smells
- Washing Machine Won’t Finish Cycle
As always, whenever you work on electrical appliances, safety should be a top concern. Remove the power source to the washer before troubleshooting or attempting repairs.
1 – Washer Won’t Turn On
If your washing machine doesn’t respond when you turn it on there may be a simple fix. There’s a number of solutions that range for serious to simple, but the best place to begin is with the power supply itself.
- Power
The first thing to check is if your washing machine is getting power. Using a multimeter check the outlet voltage. If there isn’t electricity flowing into your washer you’ll need to check your household electrical panel to see if any circuit breakers may have been tripped.
If there wasn’t a tripped breaker and your outlet isn’t “hot” then the problem may be with the outlet itself. Turn the breaker off and contact a qualified electrician to replace the outlet and troubleshoot the cause.
- Motor
If the washer’s motor overheated the washer will shut down to allow it to cool before you can start it again. If this happens once or twice it may not be a problem, but if your motor frequently overheats it’s critical to find out what is actually causing this to happen.
- Lid Switch
Washing machines are designed to stop working when the lid is open. The lid switch is a small plastic piece located under the lid. In order for the switch to activate, the lid must be shut. Check to see if the switch is in good repair and properly positioned.
- Timer Knob
Some models require the timer knob to line-up exactly with the control panel graphics. If the knob is slightly out of alignment, the washer won’t run. To check this, simply advance the timer and try to restart the washer again.
#2 – Not Draining Properly
Drainage problems can range from being as simple as a clog in the drain hose to needing to replace a pump. But one thing is certain, when you have a problem with draining you’ll be very aware . . . the mess on the floor may be your first and only clue!
- Drain Hose
Many times a clogged drain hose is the reason your washer isn’t draining properly. Remove the hose and visually inspect it for clogs. A garden hose can be used to flush any stubborn blockages from the hose.
Here are some other things to look for:
Check the drain hose for kinks.
Check any lint filters that may be in or on the drain hose.
Are you having problems with the home’s drain system?
The drain hose should be above the level of water in the drain tub.
Is the standpipe a minimum of 1-1/4″ in diameter?
Is the drain hose sealed into the standpipe? If this is the case, back-siphoning can occur. It should never be sealed.
The standpipe should be less than 96″ in height.
- Drain Pump
If you suspect that your drain pump is jammed, you’ll need to drain your tub then disconnect and inspect the hoses for foreign objects. Don’t forget to check the pump inlets. You may need to remove the pump from the washer in order to get a good look.
If you are having problems with your pump, there’s a chance that it may have locked up and seized. The motor will continue to run and attempt to turn the pump. If the pump is belt-driven, the belt will burn through or break, there is even a chance that the pulley could break. Things can go from bad to worse if the motor continues to run with tension on the belt, which can cause the motor to seize. Another possible issue could be that the bearings seized on the pump, or it may have become jammed by a pen, coin or sock. It’s also possible that the impeller blades have broken. In most cases, a new pump will fix the problem.
- Foreign Objects
If items such as socks, pens and coins get wedged between the basket and the tub, or become lodged in the pump, the washer’s ability to drain properly will be greatly reduced and even can come to a full stop. You’ll need to open the cabinet to gain access so that you can search for any obstructions.
- Detergent
If too much detergent is used there will be far too many suds. Too many suds will prevent the washer from draining in a timely manner.
#3 – Will Not Spin and/or Agitate
There’s a number of things that can prevent your washer from spinning correctly. Unfortunately, you’ll most likely need to open the cabinet in order to properly troubleshoot the problem. Let’s start with the easy fixes first, because sometimes the problem is as simple as the washer being in a soak cycle!
- Too Large of Loads
A washing machine will become unbalanced if there are too many clothes being washed in the same load. An overloaded machine will become unbalanced and not properly spin. This can also occur if the clothes are not evenly distributed within the basket. If this is your problem, you’ll need to adjust the load during the cycle to help your washer balance. You can do this either by removing all of the clothes and replacing evenly within the basket or simply moving them within the basket so that they are evenly distributed.
- Switches and Settings
The lid switch is located inside the cabinet near the door frame, and it’s designed as a safety precaution to keep hands from entering a spinning washer basket. A faulty switch will prevent the washer from running. If the switch is bad, it will need to be replaced. You can also check the setting to ensure that the speed selector switch is properly positioned. It should not be set between different speeds.
- Drain Pump
It’s possible that a foreign object is lodged in the drain pump. You’ll frequently hear a humming sound when the washer is full of water if this is your problem.
- Belts
A washing machine has a number of belts and as they wear, they can show signs of damage and even break. If you notice a belt that is showing signs of wear, you should replace it with a new one. If your problem was due to a broken belt, be sure the check that the pulley hasn’t seized. The belt may not have been the root problem. If the pulley seized, it will usually cause the belt to break. If you replace the belt, but not fix the pulley, you’ll have the same problem in the very near future.
- Motor
The main drive motor is responsible for spinning and agitating the basket. The washer motor creates the spinning directly, and frequently with the use of a clutch. Within the washer’s transmission there’s a crank type gear with connecting rods that cause the basket agitate.
If there is little or no agitation, the splines that connect the agitator to the drive shaft could be stripped and in need of replacement. In some washers a reversing motor is used. If you notice that your basket spins perfectly in one direction, but in the opposite direction it won’t work all you may need to replace the motor. Unless you are comfortable doing this, it is probably best to contact a professional. A coupler is used to connect the motor to the transmission. Over time, this part will wear and need to be replaced.
If you suspect a transmission or clutch issue, it is generally best to contact a professional as these can be relatively complex problems.
#4 – Washer Leaking Water
Beyond the mess that a leaking washer makes, the problem doesn’t always mean an expensive repair bill. Many times the solution is an easy fix or an inexpensive part.
- Drain Hose
When a washer leaks only during the spin cycle the likely cause is the drain hose.
Check the connections on the hose to ensure they are secure. Check the condition of the drain hose, it should be free of cracks and damage. Check the drain hose for any clogs. You might just find your missing sock! Check the drain hose where it attaches to the washer. There should not be any cracks or leakage, if there is, you may be able to cut the end and re-clamp the hose. Although, you may want to consider purchasing a new one.
- Fill Hose
The fill hoses could also be the culprit. Read our extensive article on fill hoses HERE.
Check that the fill hoses are in good repair and are securely in place. However, they should not be over-tightened. Whenever these hoses are removed a new rubber washer should be used when they are being put back in place. If a new rubber washer wasn’t used, the problem could be the washer.
- Water-Inlet Valve
Check the water-inlet valve for leaks. There may be a build-up of rust or mineral deposits within the valve, or it may be faulty and need to be replaced.
- Too Much Detergent
If you have hard water and use a water softener, your leakage problem may be the result of over-sudsing. Hot- and soft-water use less detergent to effectively clean than cold- and hard-water. Reducing how much detergent you use may eliminate an over-sudsing issue.
When you have too many suds and they “spill over” it may appear that you have a leak. The sudsy overflow can be resolved by reducing the amount of detergent you’re using.
- Door Seal (front-load)
Front-load washers frequently develop leakage around the door seal as this is a common area for debris to build-up. Over time, the build-up will reach a level where the door will not be able to properly seal and water will be able to seep out. Generally, you can solve this problem by carefully cleaning the seal.
- Drain Pump
Drain pumps have a seal on the pulley that will often leak due to wear. Many pumps are designed with a weep hole allowing the water to drip out as the seal begins to fail. So, whether you find a small amount of water or a flood near your drain pump, you may have uncovered the source of the leak. The pump will need to be rebuilt or replaced.
- Drains and Hoses
If you notice intermittent leaking when the washer is flushing, the problem may be with the plastic bleach dispenser. Bleach is an extremely corrosive chemical and it can cause plastic parts from the bleach dispenser to crack or even break off. In which case it will need to be replaced. The use of large amounts of liquid chlorine bleach can pit and rust stainless steel components. Consider using oxygenating bleach. It’s less harsh for your washer, although it should be noted that it’s not as effective at getting your whites bright.
- Tub
If the tub is the cause of your leak, your options are limited. When a tub develops a hole from rubbing while off balance or other from reasons, the best choice is usually to purchase a new washer. Replacing the tub usually isn’t cost effective. However, you could try sealing the leak with an epoxy. If nothing else, it may buy you a little time.
- Tub Seal
The main tub seal is located where the outer tub connects to the transmission. If you suspect that this is your problem it is usually best to contact a professional as it can be a very difficult job. You may want to weigh the pro’s and con’s of replacing the seal vs purchasing a new washer.
#5 – Does Not Dispense Detergent
If you have an automatic detergent dispenser there are two common issues that can cause this problem.
The dispenser needs to be cleaned – Clean the dispenser monthly with a cup of warm distilled white vinegar. Pour the vinegar into the dispenser and run the washer thru a regular cycle. Any built-up residue or clogs will be flushed thru and your dispenser should work as good as new.
Incorrect product – Using the right product can make all the difference in the world. If your washer was designed for liquid bleach, using a powder bleach can clog the dispenser and lines. Check your owners manual to find the type of product designed for your unit.
Tools to repair washing machine
#6 – Washer is Shaking and Moving
It might seem alarming when your washer is making noises and moving around, but the solution is generally pretty simple.
Not Level
If the floor isn’t level your clothes washer will definitely jump around. Many of the wash cycles, such as spin, can easily thru the unit into a shaking and banging mode, and if the washer is sitting on an uneven floor it will even add to the movement.
Fortunately, this is an easy fix. Position the washer on a piece of 3/4″ plywood. You can use shims if needed to bring the plywood to a level surface, but usually the plywood will do the trick.
Washer Feet Improperly Positioned
Washing machines are designed to be adjusted to the floor surface so that they sit level and do not rock. The 2 front legs have a leveling mechanism with a lock nut to secure it in place. Adjust each leg to the correct height and tighten the lock to keep the leg from moving. There shouldn’t be any movement in the front 2 legs once they are set.
The back 2 legs may have the same design as the front or they may be self-adjusting. If they are self-adjusting, tilt the washer forward onto it’s front legs so that the rear legs are roughly 3″ in the air. Then set the unit down to allow the legs to automatically adjust.
Load is Unbalanced
If your laundry is off balance you’ll need to open the washer and adjust the load. You may need to make a couple of attempts in order to get it balanced again.
Washing too many clothes in a load can exceed the maximum load weight and cause the washer to go off-balance. Check your owners manual for load size recommendations, but as a general rule, the clothes shouldn’t be packed too tightly allowing them room to move freely.
#7 – Washer is Noisy
A noisy washer could be as simple as a foreign object being somewhere it shouldn’t, or it could be a clue that a part needs to be replaced. First rule out the simple fixes, which are listed below, and then read our extensive article on the causes and solutions for a noisy washer.
Gurgling
A gurgling sound could be an indication that something is obstructing the drain line, but not enough to fully clog the hose. Remove the blockage to prevent it from becoming a full blown clog which will most likely cause a flood.
Clicking
If you hear a clicking sound you may have an object lodged in the washer drain. You may have inadvertently missed a coin or other item left in a pocket. Check your drain and remove any foreign objects.
Buzzing or Humming
A foreign object may be lodged in your pump if you are hearing a humming or buzzing noise. If an object finds it’s way into the pump it’s not uncommon for the pump to jam. You may need to replace your pump if there was serious damage, but often just removing the object will solve the problem.
#8 – Washer Smells
It’s not uncommon for a washer to develop a musty or mildew smell. This can occur either in or around the appliance, and it’s an indication of mold and bacteria growth. The washer tub provides a perfect dark, moist area for mold and bacteria to thrive.
All washers develop what is called a “bio-film” which is decaying matter that’s always damp. Some washers are more prone to this build-up than others. Over time it’ll begin to smell and if left untreated, the smell can spread into your laundry. In worst case situations, it can even cause the laundry room and other nearby rooms to smell. Read our article on how to remove this odor from your washer. A good habit to develop is to clean your washing machine every month, and be on the lookout! Periodically check the area around your washer for mold or mildew. If your walls, cabinets or other areas show signs of mold or mildew growth there may be an issue with moisture that needs to be addressed.
Detergent
Too much detergent will create excessive suds and a dirty residue will build within the basket and other washer parts.
Use the correct amount of detergent and fabric softener. This is probably the best defense simply because it’s actually limiting the food supply.
Temperature
Hot water will help dissolve the layer of bio-film. A hot soak or wash on your final load can be a great preventative measure, especially if you prefer washing in cold water.
If you have a reoccurring mold problem or you don’t use your washer frequently, you can run a second rinse cycle when you’re doing laundry to help prevent mold and mildew growth.
Drain Pump Filter
The drain pump filter should be cleaned once a month, but few homeowners perform this task unless there’s a problem. Frequently coins and other small items get caught in this filter and cause the water flow to slow creating an ideal location for mold and mildew growth.
#9 – Washer Won’t Finish Cycle
This is an easy problem to troubleshoot. If your washer continues running even after the cycle should have finished, it most likely means that the timer is defective. Remove the control panel and check the timer contacts for corrosion or scorching. A new timer will fix this problem.
Other Services We offer in Nairobi Kenya
- Microwave Oven repair in Nairobi
- Water dispenser repair in Nairobi
- Washing Machine Repair in Nairobi
- Cooker Repair in Nairobi
- Oven Repair in Nairobi